Free Crochet Pattern

While browsing crochet patterns one day before Christmas 2014, my son-in-law glanced over and spotted beard face warmers. He said, "Oh, wow! That's cool!" Isn't it a happy time to find something that someone really likes?
My criteria: to have the "beard-y", texture, be wearable and fit right.
The ones I found didn't quite make it, so this is what I came up with. And,
shame on me BIG time, I didn't write it down! But if you have just a little bit of working knowledge of crochet, you can scrumble up one of your own with these notes - they're easy to do!

- First, check out some free patterns for the basic idea and sizes:
- If you belong to Ravelry, pattern-search for "beards", and check the "crochet" box under the "Personalize" heading. (If you don't belong to Ravelry, for goodness sake, sign up; it's free, no spam and oh my, so much wonderfulness)!
- Do a web search for "free crochet beard patterns".
- This beard does not attach to the hat. It has a loop on each side that goes up around the ears. Some patterns had a button sewn on, that buttoned onto the hat.
- Using one of the patterns found in your search that is basically the way you like, begin with the stitch counts it offers.
- If your giftee has a full beard already (like mine did) you can make it cup outward more by adding more stitch increases in the rows. Add more length as necessary to cover under the chin/neck.
- I used 2 strands of Caron Simply Soft yarn held together, as it is a fairly thin worsted, or you can use a bulky weight yarn for the "fullness" look.
- Add enough width to the beard to go up into sideburns; this will conceal the yarn chain that goes over the ears to hold the beard on.
- Use a yarn needle to thread yarn through next-to-bottom row; pull yarn to gather the bottom to “cup” the beard inward and shape to the face and up under the chin.
- Attach one end of the ear loop (made with chain sts) about two rows down from the top of the side-burn, and then attach the other end close to the bottom of beard; this holds and pulls the beard weight up even so it will stay up and not ride down with movement/talking.
- To get the texture, work totally random, in any order, repeating stitches the number of times as desired for the textural look, throughout the rows:
- sc or hdc sts, repeated as many times as desired, with
- (sc in st, dc in next st) repeats, with
- (tr in st, hdc in next st) repeats and
- (tr in st, sc in next st) repeats and
- (tr in st, sl st in next st) repeats.
- When working these sts from the right side, push the bobbles they make to the right side. When working from the wrong side, the bobbles come out on the right side, so they're okay.
- When working the mustache, use sl sts instead of sc or whatever st is called for, to make it narrow and "dip" under the nose and over the upper lip.

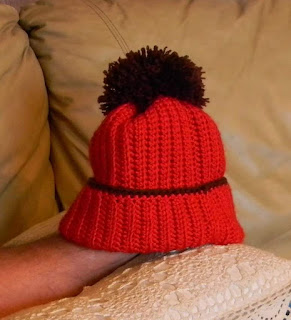
For the hat, use any hat pattern you like. The one I used is a free pattern, the
Northern Stripes Beanie.
He was surprised that I made this for him - my daughter says he wore it constantly!
And THAT makes me a happy crocheter!
Making one? I'd love to see it!
Just put your link in the Comments.
* * * * * * * * * * * * * * * * * * * * * * *
Hey! Don't be alone! Let's crochet!


