Pages

Crochet Challenge: Try a new tip

This weeks challenge:  Find a new tip to try this week.  A good place to start is Crochet Pattern Central:  Tips and Tricks.
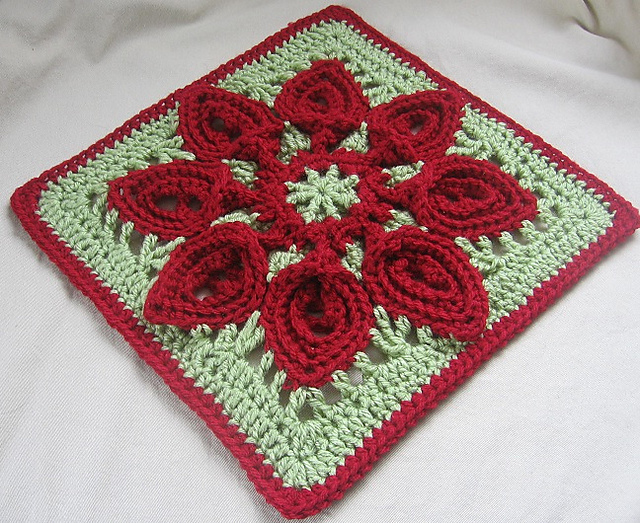
Answer:  I read crochet tips for hours and finally found one I hadn't tried and sounds like it might be a "keeper":
Instead of crocheting, and then counting, count ahead first and mark the next stitch with thread or yarn. 
On items where there are long rows, and then start a new stitch or design, this tip should save lots of time counting and re-counting and maybe re-counting again, as I often do.

Here's another one:
When I'm doing a project that requires me to change color yarn in mid stream, I use hair clips and clip the balls to the blanket that I'm crocheting on. I once had 9 balls of yarn that i was changing often to create an O.U. quilt and this worked great to keep the yarn untangled. and made it easy to change the colors without having to tie each one on. --- Lisa walker, Wed, Nov 14, 2012
My gosh what a good idea!  It's like, DUH!  Why didn't I think of that, instead of wrestling with and untangling all these twisted up balls every few minutes?!

I enjoyed this week's "challenge".  What's not to love about finding something helpful and time-saving?

Do you have any tips that you use all the time?

Until next time!
~~~~~~~~~~~~~~~~~~~

It's never too late to join the 52 Week Crochet Challenge by Julie at Red Berry Crochet!
One simple task per week - your skills, style & knowledge will evolve by just having fun! 


#crochet #tips

Free crochet granny square patterns: May 2014BAMCAL #2

I'm so grateful to the crochet designers that share their talent with us!  Here are 4 beautiful granny squares crocheted for May, with links to the free patterns.
Spiraling Into Spring Granny Square
Spiraling Into Spring 12"
Cathedral Converts Granny Square
Cathedral Converts 12"

Reflected Dragonfly Granny Square
Reflected Dragonfly 6"

Water Lily and Lily Pad Granny Square
Water Lily and Lily Pad 6"
Click the pics to go to the free pattern, and notes to get the looks shown.

The patterns for the top two are for 12" squares, but using Caron Simply Soft yarn and a G hook, I make 9" blocks.  Even then, sometimes I still need to add rows.  (SS yarn is such a thin worsted, and looks best - to me, anyway - worked with a G hook, which is often smaller than what the pattern calls for).

For the same reason, when I do a 6" square, like the bottom two, I need to add rows.

Spiraling Into Spring was a challenge to begin; I'd never done tapestry crochet before!  But the pattern was well written and there were good pictures.  A clear head is needed and just take one thing at a time and it goes well, and then it's easy.  In fact, once I got going, I loved it, want to do more like this, and expanded my crochet knowledge, which is always fun!

Cathedral Converts was easy and fun, and I loved how the popcorns made the corners.  I modified it by changing to blue for the popcorns to stand out; it was not hard to do.

Easy modifications were made to the 6" Reflected Dragonfly square, which was adorable on it's own; I'm just a tinkerer!  I wanted a square to go with it, and so wrote the pattern for the Lily Pad square, and think they look cute together.

If you make any, please let me see - I love to seeing other's creations!


#crochet #free #patterns #granny

Crochet Challenge: Best crochet tips

This weeks challenge:  What is the best crochet tip you learned that you use all the time?
Answer:  I have some I use all the time. After 45 years crocheting, I've learned what makes for faster, smoother sailing so I can enjoy what I'm doing!
  1. Keep regular count, no matter how tedious it is!  I use stitch markers to help if there are a lot of stitches to count, like on an afghan.  I'll mark every 25 stitches so if I lose my place it's easy to start again from the last marker.  Safety pins, coated paper clips, or just a short piece of yarn work just as well as purchased stitch markers.  Some use bobby pins, but I've read some that say they left little rust spots on white projects.
  2. Put center-pull skeins of yarn in old knee-high hose or socks.  The stretchy compression shrinks with the yarn, keeping it from getting tangled, and it stays clean.  Make sure the end yarn piece is pulled out and wrapped around the outside so that it doesn't get pulled into the skein and get tangled.
  3. Most projects will fit in a clear Ziploc bag.  I put each project in one, along with the yarn it will use, then put them in a bin.  It's easy to instantly see and grab the one I want.  If I get tired of one, I zip it up and grab another.
  4. My hooks, needles, scissors, markers, ruler, paper, pencil, etc. are kept separate from individual projects.  That way no matter which project I grab, or any spur-of-the-moment idea I have, they're all together, ready to use.
  5. If I'm using a pattern from a book or leaflet, I print a copy to work from.  That way I can make notes, mark my place, use a highlighter, etc.
  6. If I'm reading a pattern directly from the computer that I don't want to print out (save that paper and ink!):
  • If it's a .pdf  or .doc (Microsoft Word) file, I use the highlighter to highlight the part of the pattern instruction I'm on.  When I finish that piece of instruction, I highlight the next part, and so on.  This makes it fast to spot exactly where I am.
  • If it is not a .pdf or .doc file, I copy and paste the pattern into a MS Word document so I can use the highlighter, and if there is a particularly long instruction for a row or round, then I can break it up into easier to read pieces.
    For example, for this instruction:
    With right side facing, join A with slip st in first sc to work across st of last row; ch 3, 6 dc in same st as join, *skip next 2 dc, sc in next dc, 6 dc in next sc; repeat from * to last sc, 7 dc in last sc; working down long side and in ends of rows, **sc in space between next 2 rows, 6 dc in sc of next color row, skip next color row;** repeat from ** to Row 1

    I would hit the "ENTER" to break it into manageable segments like this:
    With right side facing,
    join A with slip st in first sc to work across st of last row;
    ch 3, 6 dc in same st as join,
    *skip next 2 dc, sc in next dc, 6 dc in next sc;
    repeat from * to last sc,
    7 dc in last sc;
    working down long side and in ends of rows,
    **sc in space between next 2 rows, 6 dc in sc of next color row,
    skip next color row;**
    repeat from ** to Row 1
    This may seem like more trouble than it's worth but it's very quick to do and has saved tons of time reading, re-reading, missing stitches and starting over!

    Tip:  Put a shortcut to MSWord (or your word-processing program)
    on your computer desktop so it's handy.

    What are some of your best tips?

    Until next time!
    ~~~~~~~~~~~~~~~~~~~

    It's never too late to join the 52 Week Crochet Challenge by Julie at Red Berry Crochet!
    One simple task per week - your skills, style & knowledge will evolve by just having fun! 


    #crochet #tips

    Outside-In Crocheted Granny Squares

         Outside-in crocheted granny square

    I've enjoyed testing two crocheted grannies for funnydiebarbarin (on Ravelry).  Actually it was one square, but it had two options so I did it in each option.

    funnydiebarbarin is the original Outside-In Block Designer, meaning, you start crocheting the outside of the block first, and work your way to the center!

    The first square made was the yellow/blue/brown one on the left, and I liked it so much that I made it in my 2014 CAL colors (on the right).  The only difference the option made for that square was connecting the corners.  Can you see?

    I must say I love her designing style!   The square had various stitches with interesting looks and textures, and were not difficult, and working from the outside in is a fun change!

    If you want to try this technique, try out her Outside-In Crochet Square.  The squares above were test squares, so the patterns are not published as of this post, but click her name (above) to go to her designs and check for the latest.

    #crochet #square #outside-in

    Crochet Challenge: What's your crochet style?

    This weeks challenge:  What kind of crocheter are you?  Do you like to follow a pattern exactly as it's written?   Do you like to "wing it" and make things up as you go?   Are you a little bit of both?
    Answer:  I enjoy the patterns made as the designer intended them, but may also be inspired to add to the story I see.

    One example of crocheting a story is this giraffe afghan and matching toy for my youngest grandson.  The pattern, as written, includes the giraffes, tree, grass and cloud elements.  But in viewing the design, I transported to the African savanna, and more details emerged in my imagination:

    Free crochet patterns - Giraffe Afghan and Toy
    Click for patterns and info
    The sound of the giraffes crunching the succulent leaves; the heat of the hot sun bearing down and lighting up the day, while fluffy clouds slowly scud through a blue sky.

    A beautiful bird flies through a flutter of butterflies, and surprise at an elephant walking onto the scene!  The scent of the flowers, and the delight at soft fuzzy caterpillars crawling on the tree and stone, and startle at the ssssnake warming himself on a rock!

    Designing and incorporating the additional elements, and adding texture with different yarns for the tree trunk and clouds, made it a one-of-a-kind project.

    A smile was on my face as I pictured the light in my daughter's eyes when I gave it to her for my grandson, imagining how in a couple of years he would enjoy the stories he would see in his own mind while he slept and played with it.

    How can any craft be more joyous than that?!

    An example of crocheting feelings is an afghan I made for my Nana.  Her favorite flower was the pansy.  I remember from the time I was a very little girl, going outside with her to pick pansies to float in a bowl of water.

    She'd always say, "Pansies are special flowers, because no two are exactly alike.  Look!  There's a face of a pretty lady in the middle.  She's wearing a beautiful bonnet."  She crocheted afghans and slippers for everyone in the family, but didn't have one herself.  So I made one for her.  It had a pansy on each block, and no two were alike; they all had a different color combination.  I added an embroidered a message on the bottom border thanking her for teaching me that pansies were beautiful because they were different, and so it was with people.  She slept with it every night and day and asked to be buried with it.

    Crocheted Iris
    An afghan I'm working on now, still in the planning stages, is for my mom.   I've designed this iris for it, and am working to gather up other particular elements that are especially meaningful to her.

    What's your crochet style?  Do you have a project you've tweaked that you'd like to share?  I'd love to hear from you!

    Until next time!
    ~~~~~~~~~~~~~~~~~~~

    It's never too late to join the 52 Week Crochet Challenge by Julie at Red Berry Crochet!
    One simple task per week - your skills, style & knowledge will evolve by just having fun! 


    #crochet #patterns #style #giraffe

    Crochet Challenge: First Project


    This weeks challenge:  What was your first completed project that you made?
    Answer:  I didn't start out small!  I was fascinated with all the afghans that Nana made for everyone.

    She really put it in perspective when she said that an afghan is no different than a pot holder - it's just bigger.  What a great way to put it to a "newbie" - it made it so do-able.  I thought, well then, I can do that!

    Crocheted Ripple Aghan
    I was 13, she taught me to single crochet, then showed me how to read the pattern and start this ripple afghan.  It was made with 2 strands of yarn held together and a size K (6.5 mm) hook.

    I did about 2/3 of it, then it sat for 5 years before I finished it.  I still have it to this day, 45 years later, and have such fond memories of sitting with Nana, talking and crocheting.

    Ripple afghans are still fabulous to crochet.  After a few rows the stitch is memorized and it can be done without the pattern.  It's easy to make any size desired - just make the beginning chain more or less.  Single crochet, double crochet, or vary stitches and add other stitches.  Change colors up, use chunky yarns, hold 2, 3, 4 strands of yarn together for a super quick and elegant gift.  Options are endless!

    Just do a search for "free crochet ripple afghan pattern".  You'll have tons to choose from.

    What are your earliest memories crocheting?

    Until next time!
    ~~~~~~~~~~~~~~~~~~~

    It's never too late to join the 52 Week Crochet Challenge by Julie at Red Berry Crochet!
    One simple task per week - your skills, style & knowledge will evolve by just having fun! 

    Free crochet granny square patterns: May 2014BAMCAL #1


    Free crochet pattern - Calla Lily Granny Square
    This crocheted calla lily block is one of my favorites; and what makes it jaw-dropping, is that the pattern is free!

    The name of the pattern is Purifying Puritans 12" Afghan Block/Tutorial by Margaret MacInnis (aka mugginsquilts on Ravelry).

    The pattern as written did not have the bullions in the center.  It's gorgeous just as it is written, though, isn't it?

    TO GET THE LOOK

    • The pattern is for a 12" square, but I used hook size G (4.00mm) and Simply Soft yarn to make the 9" square that I prefer.
    • Wish I could take credit, but the idea of adding bullions was not mine!  I was inspired by fellow Ravelry member, Lettice.  View her notes to see how to do it:  Click Lettice's Peace Lily or cut and paste the following link: http://www.ravelry.com/projects/Lettice/purifying-puritans-12-afghan-block-tutorial-2  (You shouldn't have trouble but if you do, let me know; I'll get them to you)!
    • See TIPS, below

    TIPS

    • Don't be a dufus like I was!  I struggled for a long time trying to understand how the petals connected, before remembering that the lovely Ms. MacInnis provides two pattern options - a short version (which I had downloaded), AND a photo tutorial (which I hadn't, because I forgot about it). *Banging head on computer*  My confusion would have been solved in the blink of an eye because it was an easy thing!
    • Are bullions scary???!  The square itself is not at all difficult to do.  The addition of bullions does increase the difficulty, but if you've been afraid of the bullion stitch, watch this video, using a STRAW as an aid:  Crochet the Roll or Bullion Stitch + tips & tricks.  
    Crocheted example of the bullion stitch
    I'd never done bullions before either.  Here are my very first ones I did after watching it.  If I hadn't found this particular method, I might not have adopted this as a "can do" stitch!


    Free crochet pattern - Calla LilyHere's my first "lily" for the square, using Lettice's instructions.

    If you watch the video and give the bullion stitch a try, or find another method that worked better for you, I'd like to hear your personal experience!

    In any case, whether you're new to bullions like I was, or experienced, I'd love to see some of your work!

    Until next time!
    ~~~~~~~~~~~~

    #freecrochetpatterns #purifyingpuritans #lily #bullion